Switzerland in Z Scale.
Dave Gotliffe updates us with progress on his current project.
June 2017.
My background in railway modelling
Coming from Cardiff I am a GWR man at heart, and my previous N-Scale exhibition layout, Maybury, was set firmly in GWR territory in South Devon. But I have also been a Swiss railway enthusiast, and a member of the Swiss Railways Society, for many years.
Maybury was 16 feet long, broke down into four sections, needed a large van to move it and took hours to set up at shows. When I decided to build a new layout about 8 years ago I wanted something that would fit onto a single baseboard and into a small van to take to exhibitions. I can’t get excited about layouts that involve shunting one wagon three feet in each direction all day, so in view of my self-imposed size constraints I wondered if Z Scale was practicable. Z Scale is 1:220, with a track gauge of 6.5mm. That makes it about 2/3 of N Scale, or about 1/3 of OO/HO scale. It was invented in 1972 by Marklin, and that company continues to be the main manufacturer of Z Scale in Europe. Most of its products are of German and Swiss prototypes, so in view of my enthusiasm for Swiss railways I settled on a Swiss layout. Having experimented with a Marklin starter set I quickly became hooked on Z Scale, and having built my first layout Alpenstadt (measuring 1800 x 600mm) a few years ago I am now constructing a second Swiss Z Scale layout, Kyburg, even smaller than the first at 1250 x 600mm - the same size as a small sheet of MDF from B&Q. But in Z Scale this is still big enough to have a twin-track continuous run, with part of a station at one end.
I make my own buildings and scenery from scratch as far as possible. For rolling stock I mainly use off-the-shelf products, although I have scratch built two Swiss EMUs that fit onto proprietary chassis (construction of which I will describe in a future article). The quality of Marklin locos and other rolling stock is outstanding, but in this country it would be impracticable to acquire any quantity without eBay: for one thing, Z Scale isn’t widely available from UK shops, and for another, it doesn’t come cheap if bought new. Fortunately there is a plentiful supply of second-hand items available on eBay, especially from “eBay de” (Germany) rather than eBay UK. And, of course, my second layout also being Swiss means that I can use the same rolling stock for both layouts.
If you use eBay for model railway supplies I suggest giving “eBay de” a try, regardless of the scale you model in. The Germans invented model railways and these days they seem to have vast supplies for sale in all scales.
Swiss railways
Although Switzerland is famous for its comprehensive rail network, the route mileage of the standard-gauge Swiss federal railway (the SBB) is quite modest at just under 2000 miles, most of which is in the commercial and industrial north of the country. (By comparison, Network Rail currently operates about 10,000 route miles in the UK.) My latest layout, Kyburg, is based on two real locations on the SBB network - St Gallen in the north-east and Baden in the north-west (not to be confused with Baden-Baden, which is in southern Germany!).
One of the advantages of modelling Switzerland is that being a mountainous country there are many locations where the line runs out of a station and straight into a tunnel. At Baden, the main line does just that – it runs east out of the station under a road bridge and straight into a tunnel which has a castle on a hill directly above it. It really does look like a full-size train set, and lends itself to being modelled in a very compressed space without looking too unrealistic.
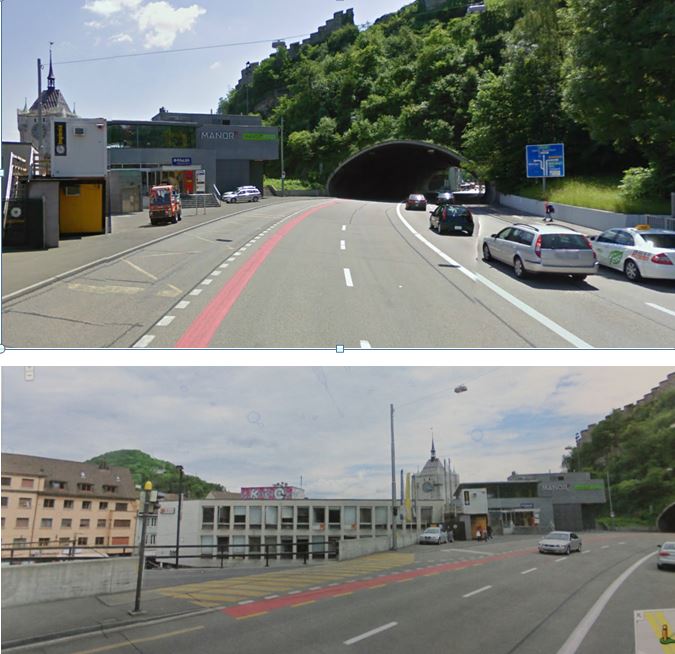
The real locations: Baden
The pictures below show the main ring road at Baden going into a short road tunnel. On the left are two buildings, both of which have upper entrances on the ring road and lower entrances on another road that runs at right angles underneath. The railway line (part of the main line from Basel to Zurich) runs under the ring road and into a tunnel with a hill (topped by Stein Castle) directly above it. Although compressed and simplified, I am trying to capture this setup on the right-hand side of my layout.
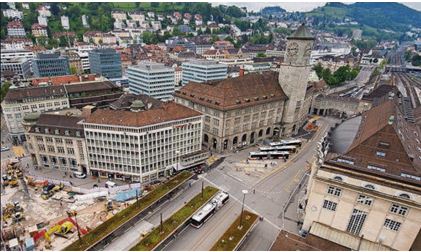
The real locations: St Gallen
The pictures below show the station and surrounding buildings at St Gallen. Opposite the station there is a substantial building housing the central post office and various other civic offices. I have tried to capture the essence of this lovely building, including its large clock tower, on my layout, together with a compressed version of the station building and train shed. I have also included the connecting overbridges, which at the original site connect the main SBB station to the adjacent narrow-gauge Appenzel Railway terminus. I thought they would make interesting and unusual structures to model.
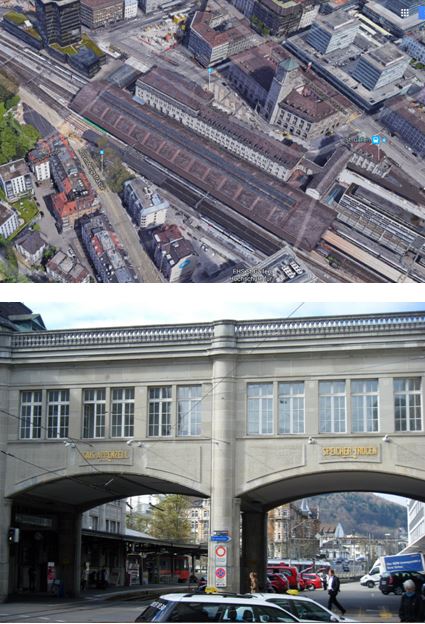
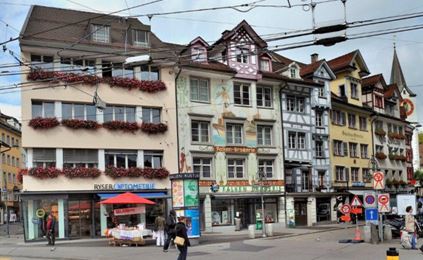
In order to give the layout some colour, and to try to break up the symmetry of the civic buildings, I have added some shops and offices, including a row of shops that contain a random variety of roof shapes, windows and colours. The original is in St Gallen city centre, very close to the station (although not as close as in my model).
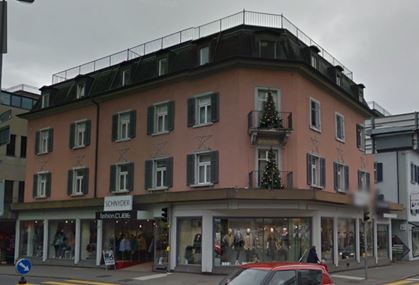
I also modelled a store, based on an original in Rapperswil, which added more colour, some plate glass windows and a three-way corner, for variation.
Z Scale Buildings
I have absolutely no artistic skill, and no professional training with regard to constructing buildings. What I do have, however, is years of experience, enthusiasm and an eye for detail.
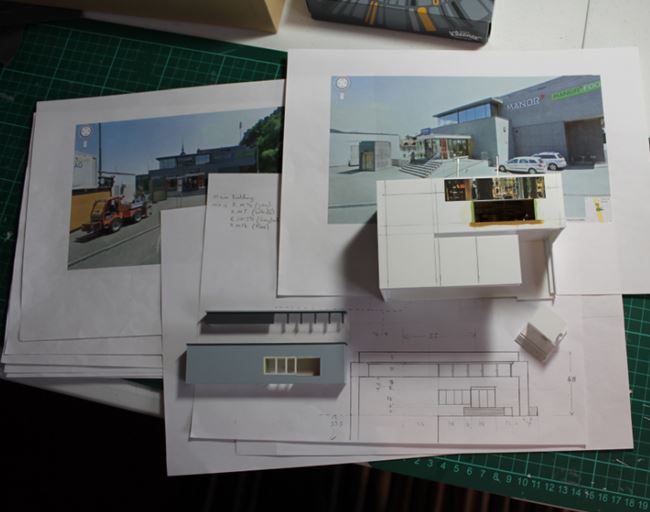
Before starting construction I spend a lot of time making detailed drawings based on as many photos of the originals as I can find. Working in such a small scale I find that in some respects I can get away with leaving out much of the detail that would be necessary in the larger scales. On the other hand, all basic proportions have to be just right; an error of 1mm can be quite visible in Z Scale, and any right angle that is even slightly out of true is noticeable.
Detailed drawings quickly show up any flaws in my measurements, and also ensure that the thickness of the building material itself is correctly taken into account. I usually produce drawings to the actual size of the model or greater. A selection of my drawings is reproduced below:
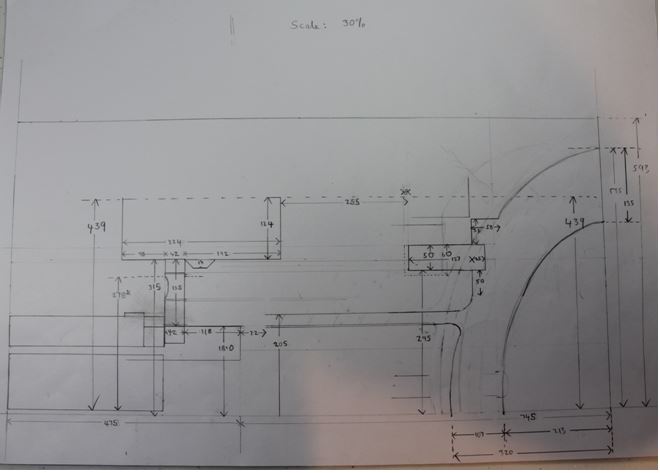
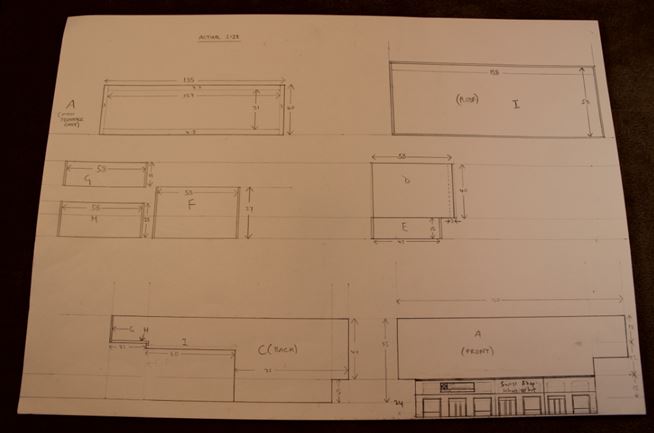
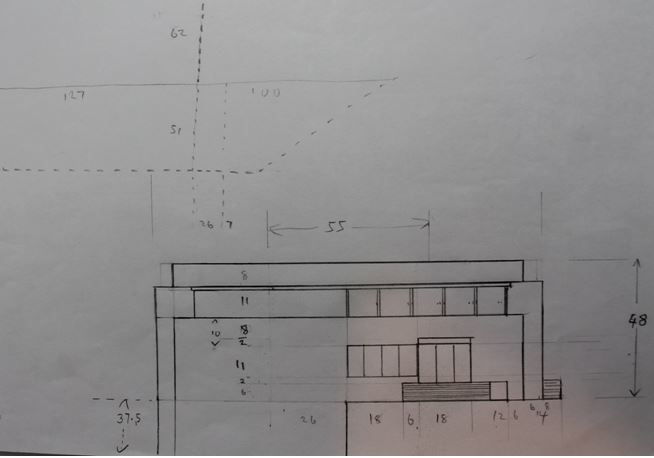
Any retired architects in our group will probably find my drawings laughable, but they at least mean that when I come to cut the materials they usually fit together pretty well.
Building materials
Most of my buildings are made of plasticard. For brick walls, stone walls and roofing tiles I usually laminate 1mm plain card with 0.5mm embossed card. Small structures (up to, say, 100mm in length) don’t require much bracing, but larger buildings have their corners reinforced with 2-3mm square beams and suitably-spaced bulkheads. I always insert sheets of plasticard to create each floor of a building. I sometimes model the interiors of the floors (depending on how visible they will be on the layout). I generally use Revell Contacta polystyrene cement to bond plasticard. It is not as thick as other makes and can therefore be applied with a brush to small areas. I rarely use Mekpak or similar liquid polystyrene cements: the fumes are terrible and I find that Revell Contacta usually does the job just as well.
In addition to plasticard I use other conventional modelling materials, such as thin plywood, plaster and foam board – nothing unique to Z Scale, and I imagine that most modellers will use very similar materials, regardless of their chosen scale.
Building Illumination
I have installed LEDs throughout all of the buildings in order to create some illumination. Diane, my wife, suggested this and she turned out to be right. This is yet another area where I started out with a complete lack of expertise. I bought a brief guide to the subject from All Components Ltd - a regular trader at local shows, and from whom I acquire most of my LEDs - and this helped to put me on the right track (no pun intended!). I think the knack is not to make the lights too bright, as I didn’t want the layout to end up looking like Times Square. This involved experimenting with various resistors until I achieved the desired modest level of light. The job turned out to be very fiddly, but not inherently difficult.
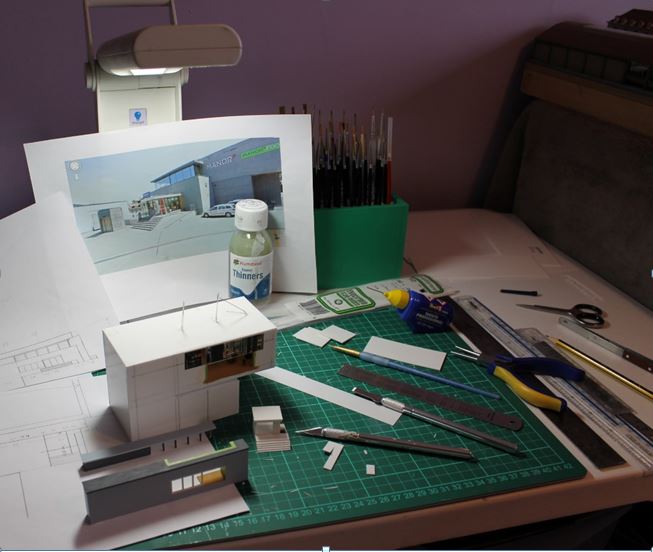
My Man Cave
A small bedroom serves as my Man Cave/modelling room. Here it is, showing the multi-level Manor Foods building under construction.
The layout so far
After considerable deliberation and research, the layout will be called Kyburg. In reality there is a small area of Switzerland called Kyburg, about half-way between Baden and St Gallen, but there is no town or city of the same name. The name is derived from the Kyburg family, who ruled the area in the 12th and 13th Centuries. Stein Castle in Baden was once owned by the Kyburg family, so this seems to make the name appropriate for my composite location that includes Baden.
The final selection of photos, below, shows the layout so far, including my representations of the buildings described above.
I will post some further articles and updates on the layout in the coming months. Meanwhile, I would welcome any comments, questions or suggestions for improvement of the layout.
Dave Gotliffe,
Broseley,
June 2017.